要访问 ArcGIS CityEngine 中的教程工程, 打开 CityEngine,然后单击帮助>下载教程和 主菜单中的示例。选择教程或示例后, 项目将自动下载并添加到 CityEngine 工作区。
本教程是与Houseal Lavigne Associates的Devin Lavigne合作创建的。

CityEngine 是一个“程序建模应用程序”,这意味着 2D 形状经过一系列过程(CGA 规则文件)生成 3D 模型。CityEngine 的强大功能在于 CGA(计算机生成架构)。CGA 是 CityEngine 的形状语法,是一种独特的编程语言,您可以指定它来生成建筑 3D 内容。实质上,将 CGA 规则指定或应用于形状时,将创建 3D 模型。3D 模型的复杂性取决于 CGA 规则及其中的说明。一个简单的CGA文件可以采用建筑物覆盖区形状并将其拉伸以使其具有3D形式或体量。而更复杂的 CGA 规则可能会将纹理应用于体量的立面,或将其拆分为其他部分,从而生成丰富、详细的 3D 模型。
编写 CGA 的关键之一是以增量方式创作规则并随时构建功能。虽然为所需结果制定计划很重要,但您不会创作 500 行代码,然后单击 go。相反,您开始逐步构建规则,随时测试结果。
本教程将指导您创作规则,该规则从简单的覆盖区创建一系列 3D 建筑物。
打开场景
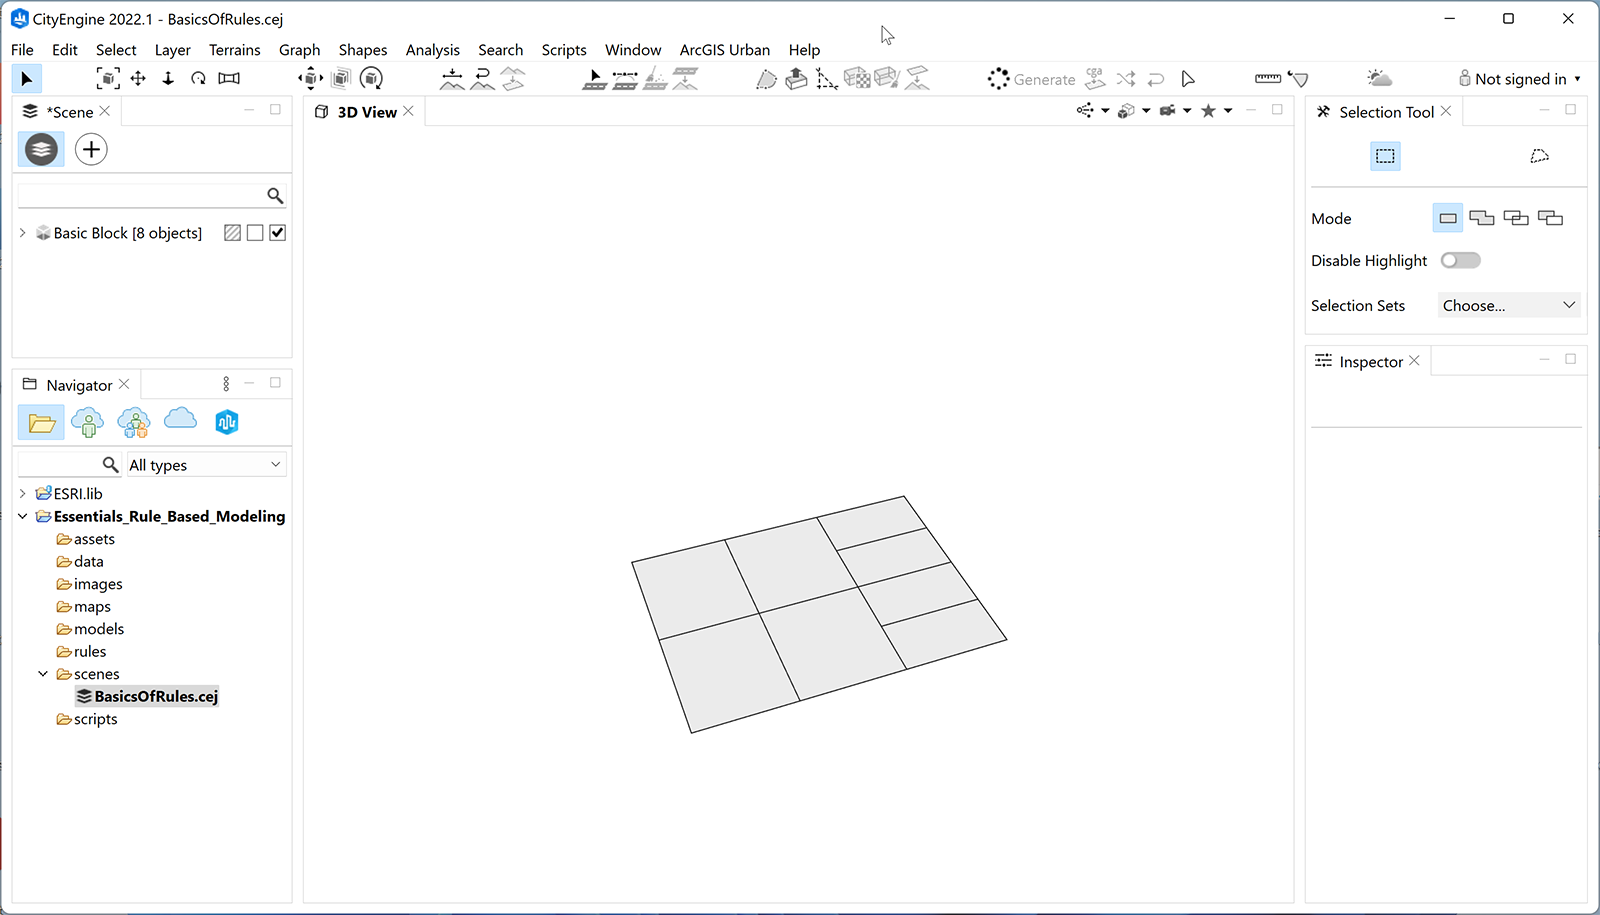
首先,在项目的 scenes 文件夹中打开 BasicsOfRules.cej 场景:
世界您好!
在编码中,有一种叫做“Hello, World!”的东西——一种编写简单代码的方法,它输出一条简单的消息,这样你就可以看到基本语法并确认你的代码是否正常工作。CityEngine 中一个简单的“Hello World!”版本是对随机高度的简单拉伸,将颜色应用于形状。
因此,要创建第一个规则,请右键单击 rules 文件夹,然后转到新建> CGA 规则文件并将规则命名为 DetailedBuilding.cga。
首先,在代码行下方添加以下行,说明您正在使用的 CityEngine 版本,例如版本 2022.1,然后保存您的规则。
@StartRule
Footprint -->
	extrude(rand(10,100))
	color(1,1,0)
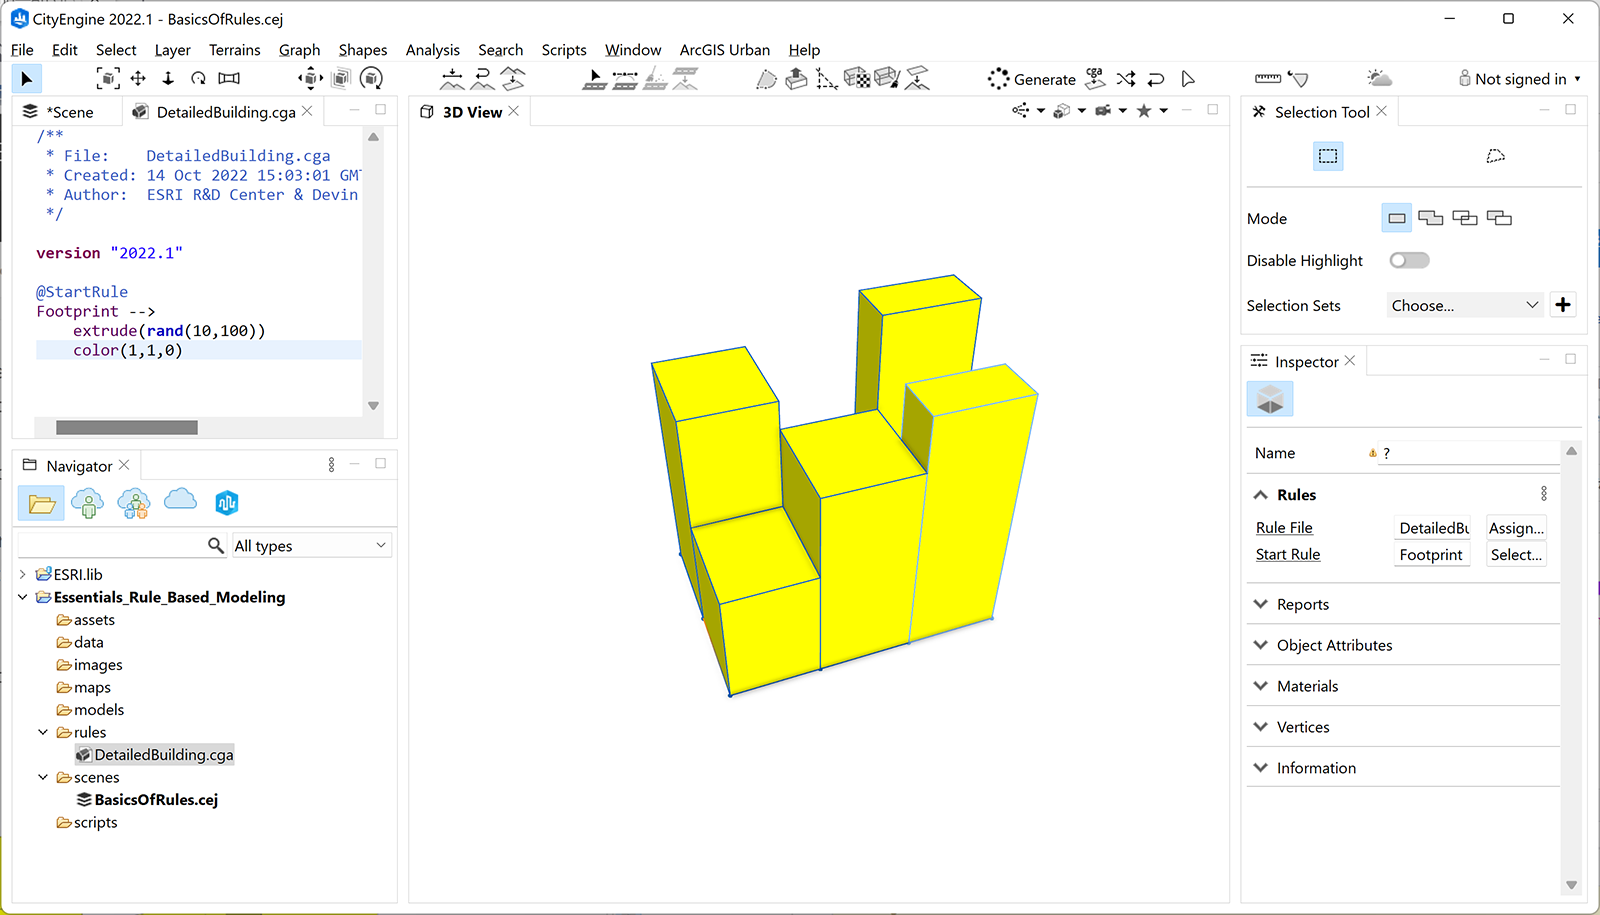
通过批注@StartRule,这会使占用空间规则可从选取器中使用。下一行将形状拉伸为 10 到 100 米之间的随机高度。最后,最后一行在 RGB 中将形状着色为黄色。
分配规则
保存规则后,选择形状并为其分配规则(请参见下图)。如果在分配新规则后没有任何反应,请单击“生成模型”工具 ![]() (Ctrl+G) 或单击主菜单中的“形状”>“生成模型”。
(Ctrl+G) 或单击主菜单中的“形状”>“生成模型”。
添加属性
现在您的规则已正常工作,请将高度添加为属性,以便为规则提供一些附加功能。请记住,关键是增量更改,因此您不是从头开始,而是要修改已经开始的规则:
@Group("Building Shell")
@Range(min=0, max=100, stepsize=1)
attr building_height = rint(rand(10,100))

@StartRule
Footprint -->
	extrude(building_height)
	color(1,1,0)
这些更改将随机建筑高度移动到名为 building_height 的属性。这仍会为每个形状生成,但会将其移动到您可以在“检查器”窗口中控制的属性。您还添加了一个名为 rint 的新内置函数,该函数将随机数舍入到最接近的整数。
@Group批注可帮助您组织属性在检查器窗口中的显示位置。@Range批注控制滑块的功能。通过将建筑物高度设置为属性,您现在有一个滑块来控制每个形状的高度。
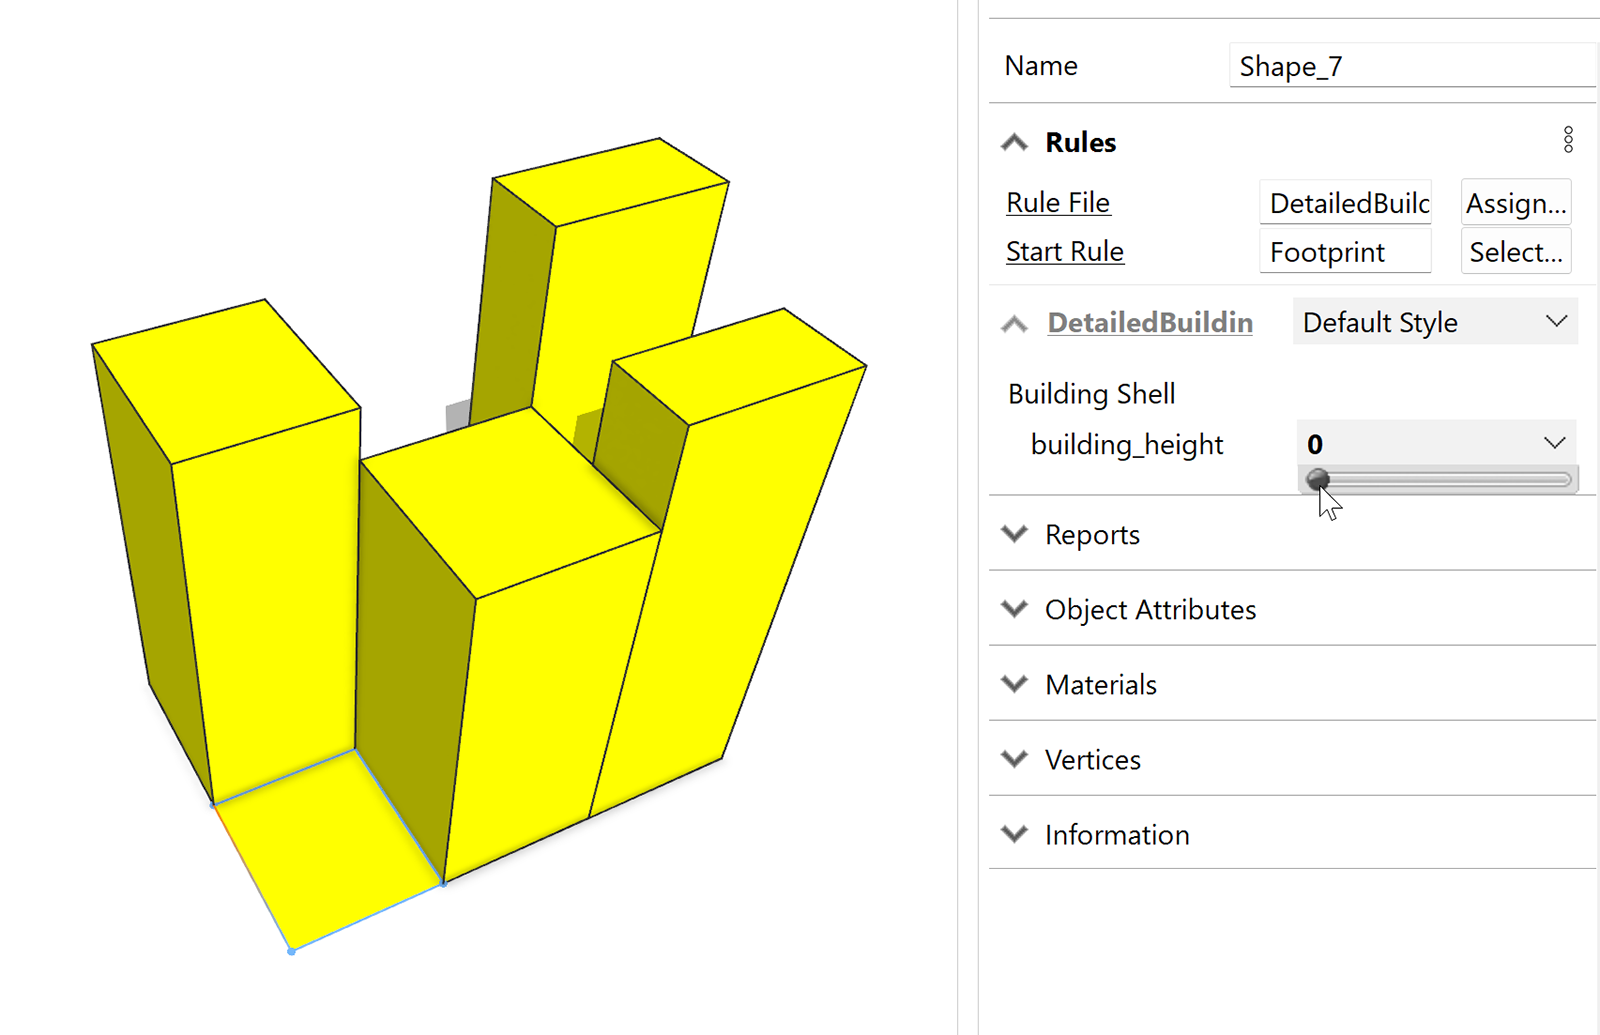
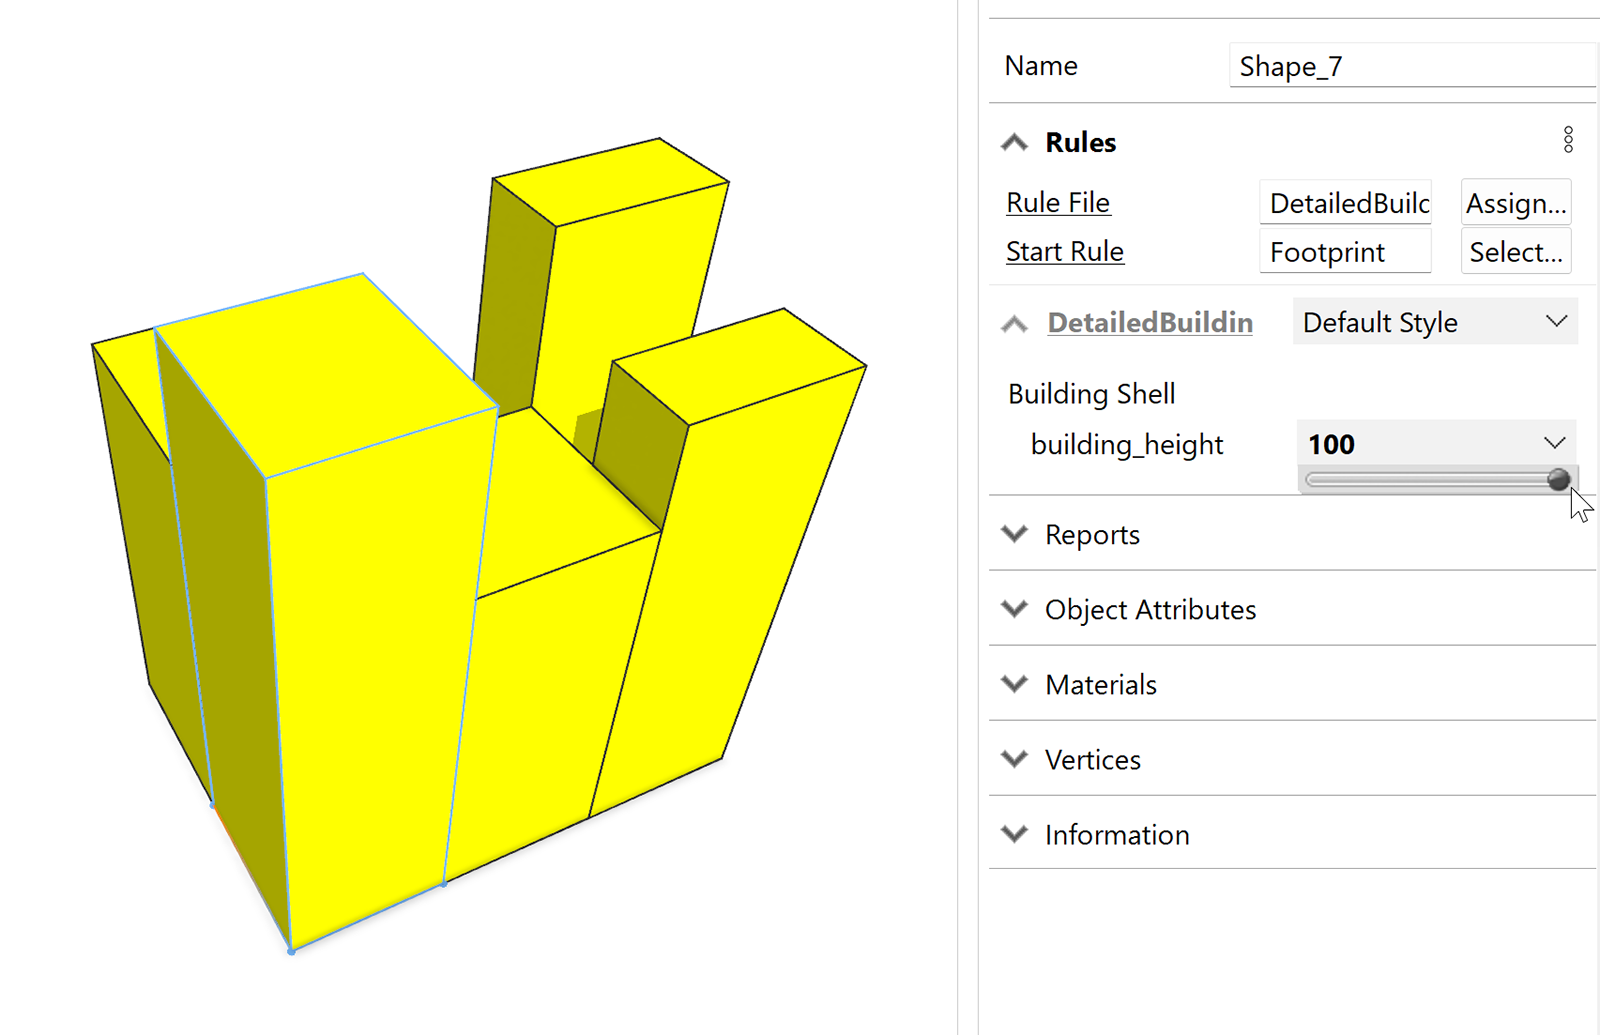
现在,如果您单击建筑物,则可以调整高度并覆盖随机数。此外,滑块现在仅在 0 到 100 之间,即范围的最小值和最大值。
添加控点
句柄扩展了属性的功能,并以非常直观和交互的方式将控件引入场景。
添加@Handle注释和体量规则以包括控制模型中建筑物高度的控制手柄:
@Group("Building Shell")
@Handle(shape=Mass, axis=y)
@Range(min=0, max=100, stepsize=1)
attr building_height = rint(rand(0,100))

@StartRule
Footprint -->
	extrude(building_height)
	color(1,1,0)
	Mass
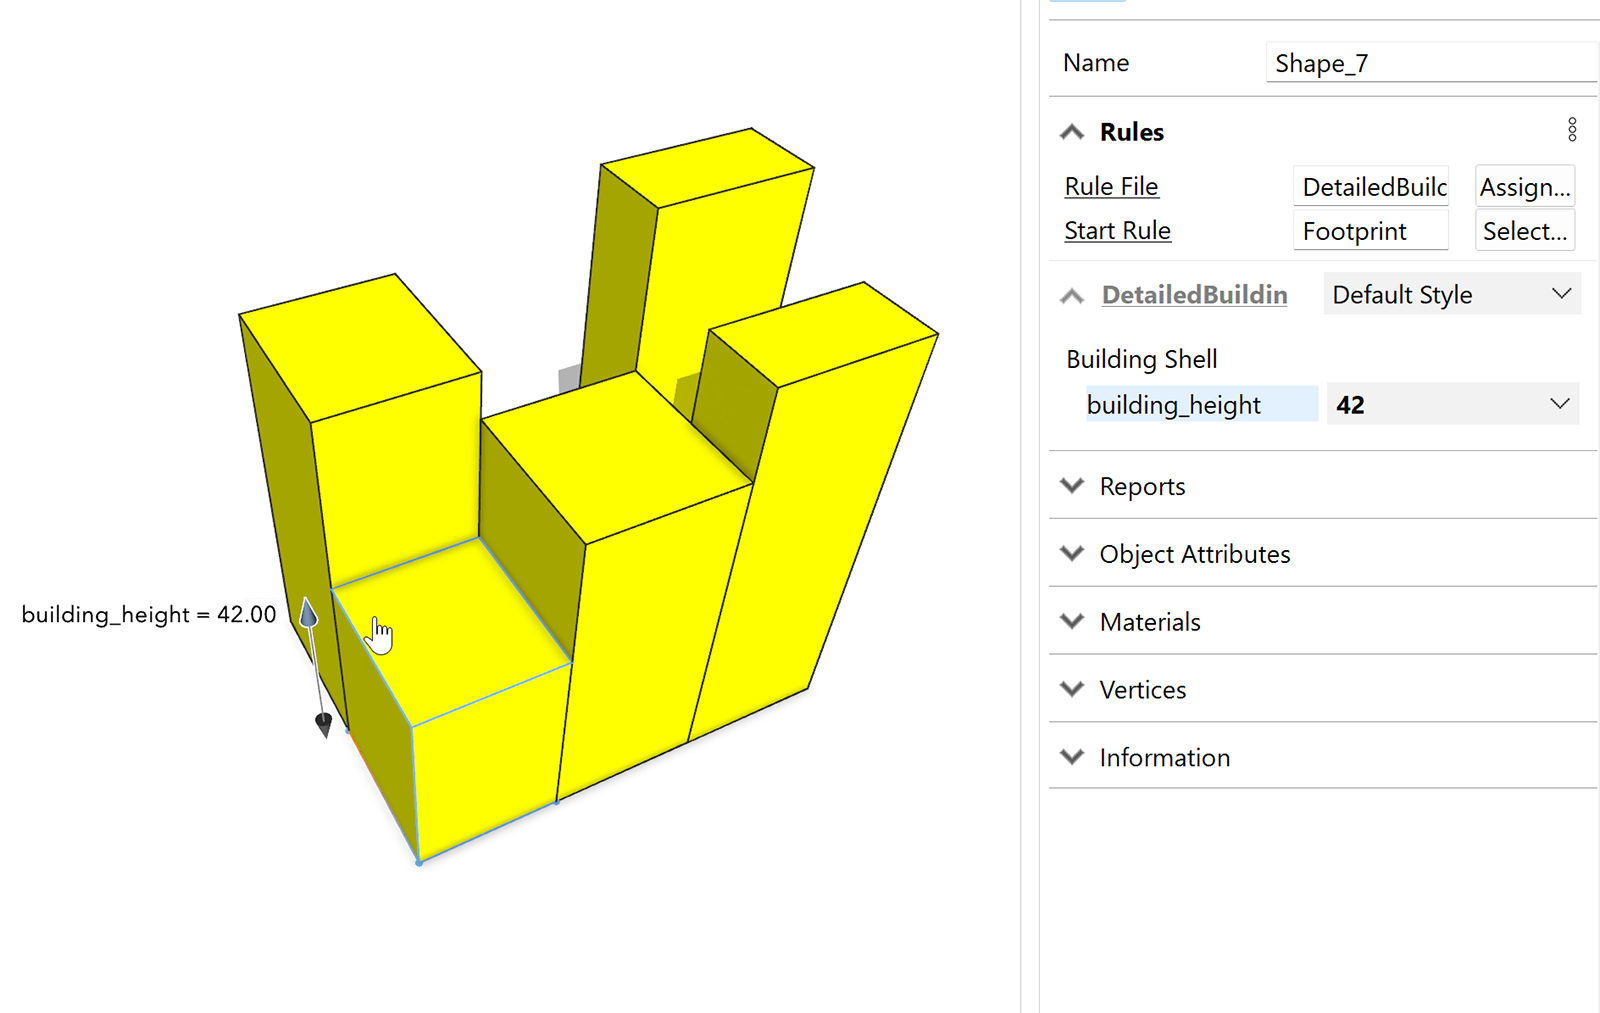
请记住重新生成模型 (CTRL+G) – 控点显示在建筑物上,允许您调整高度属性。
添加楼层分割
继续对规则进行增量修改,现在您将添加一些代码以垂直(沿 y 轴)为每个楼层分割建筑物。
使用由新floor_height属性控制的拆分操作创建质量规则。请注意,默认单位是米,因此下面的代码显示 3.048 米,注释(由 # 表示)只是为了让你知道它的 10 英尺。
@Group("Building Shell")
@Handle(shape=Mass, axis=y)
@Range(min=0, max=100, stepsize=1)
attr building_height = rint(rand(10,100))

@Range(min=1, max=25, stepsize=1)
attr floor_height = 3.048	# 10 feet


@StartRule
Footprint -->
	extrude(building_height)
	color(1,1,0)
	Mass

Mass -->
	split(y) { floor_height : Floor }*
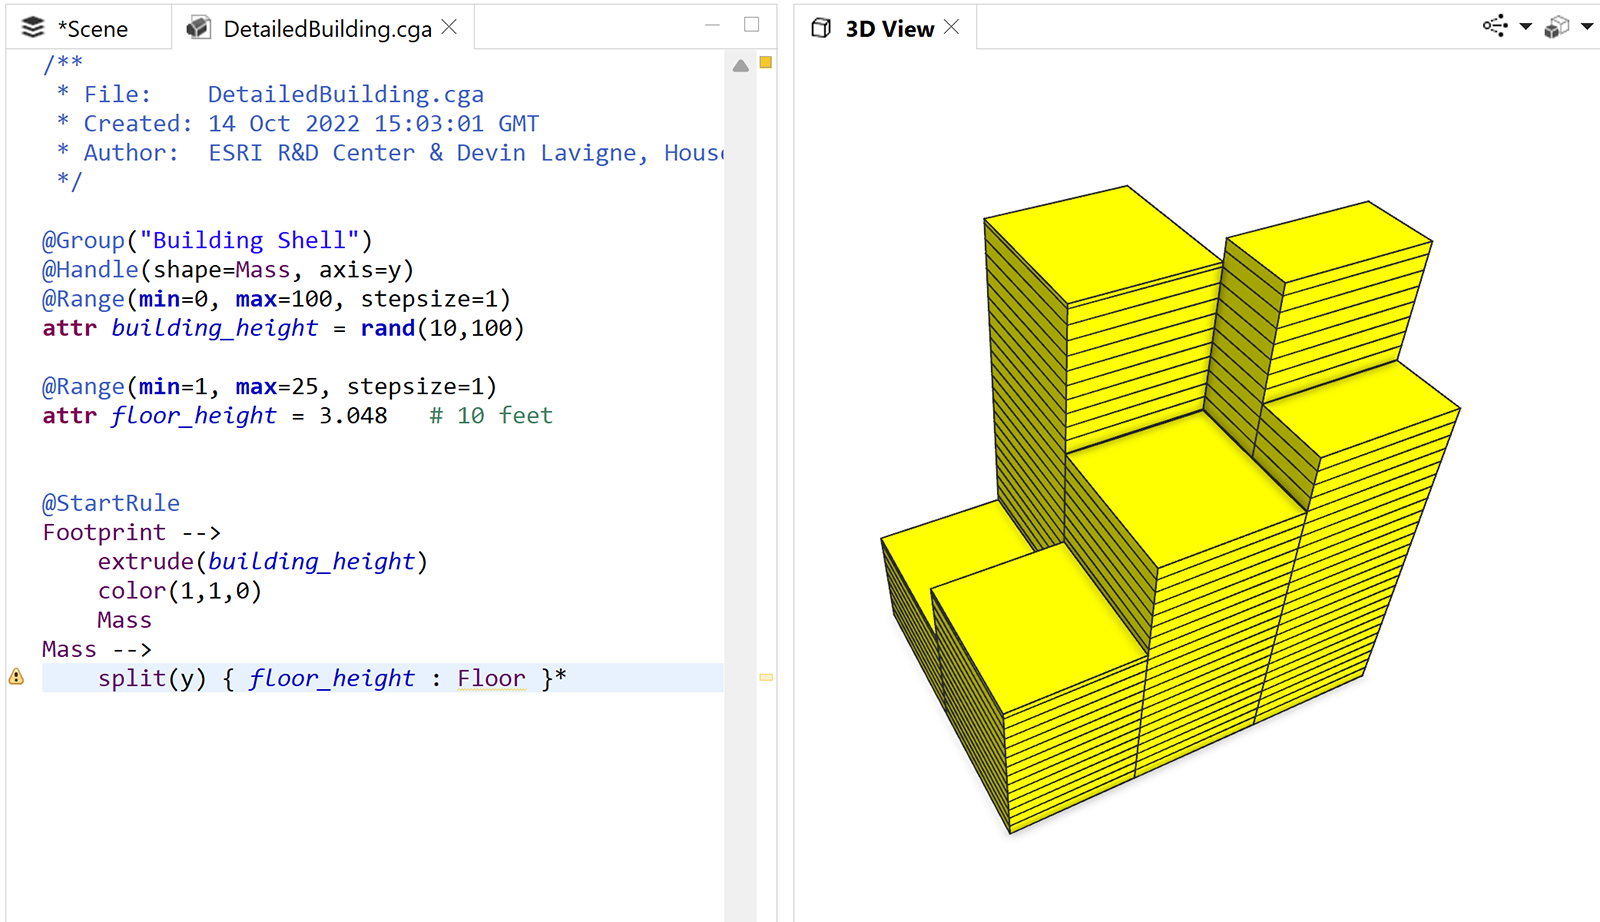
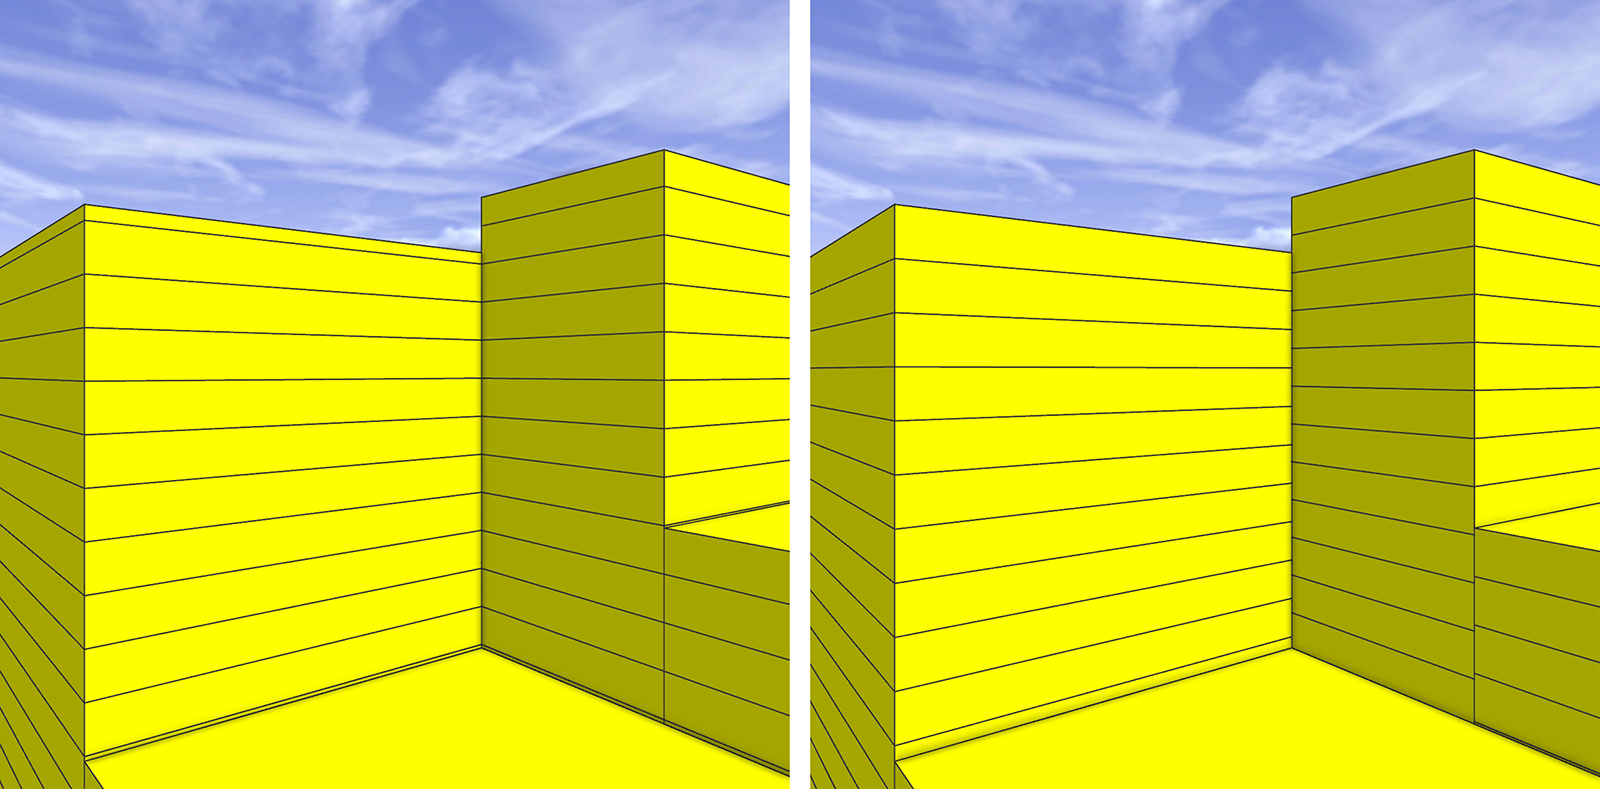
You may notice that the top floor of your building has a different floor height. This is because the split starts at the bottom and splits upwards, and the top floor height is what remains after all the splits have been performed.
One way to fix this is to add a tilde character (~) in front of floor height. This tells CityEngine to use a floating size, which allows the software to adjust the split automatically. Each floor won’t be exactly 3.048 meters, but they will all be equal and there will be no left-over parts.
Mass -->
	split(y) { ~floor_height : Floor }*
Build a function for coloring by use
First, you should comment out the line in your @StartRule in which you assigned a color to the footprint. Although you can change the color multiple times as a shape is processed from rule to rule, its good practice to set a color only once.
Add the #color(1,1,0) comment:
@StartRule
Footprint -->
	extrude(building_height)
	#color(1,1,0)
	Mass
函数是例程或代码块,您可以使用和重用它们来执行返回值的过程。要按土地利用对地板进行着色,可以构建一个简单的函数,可以调用该函数来使用适当的颜色。为此,您还需要创建属性,以允许您按楼层位置选择不同的土地用途。
@Group("Building Shell")
@Handle(shape=Mass, axis=y)
@Range(min=0, max=100, stepsize=1)
attr building_height = rint(rand(10,100))
@Range(min=1, max=25, stepsize=1)
attr floor_height = 3.048	# 10 feet

@Group("Land Use")
@Enum("Retail","Office","Multi-Family")
attr use_ground = "Retail"

@Enum("Retail","Office","Multi-Family")
attr use_upper = "Multi-Family"
接下来,在您的属性和@StartRule之间创建一个新函数。下面的函数采用 use 参数并对其进行评估,以返回立面的正确颜色。如果 use 参数不匹配,它将传递颜色#FFFFFF或白色。
getColor(use) = 		case use == "Retail" : "#FF6633"
				case use == "Office" : "#6699FF"
				case use == "Multi-Family" : "#A97C50"
				else: "#FFFFFF"
最后,通过查找底层和上层,然后调用函数为地板着色,将它们放在一起。要将顶层与所有上层拆分区分开来,请使用 split.index 和 split.total,它们在您调用拆分时都会创建。为此,您将扩展代码以添加楼层规则。楼层规则首先执行条件规则 – 案例。如果 split.index 为 0,则它是底层,其他任何内容都是上层。确定楼层后,将调用该函数并设置地板颜色。
Floor -->
	case split.index == 0:
		color(getColor(use_ground))
	else:
		color(getColor(use_upper))
通过调整高度和土地利用属性,您现在可以实现更多样化的拓扑:

创建常量
创建常量允许您创建静态数字来执行计算。这有多种用途,包括本教程下一部分将介绍的报告。下面的代码行可帮助您从平方米计算平方英尺以及建筑物中的住宅单元数。但是要知道,常量可以用于任何内容,并且可以放置在代码中的任何位置。也就是说,最好将常量放在页面顶部附近。请注意,这些常量将 CityEngine 默认度量值(米)转换为美制值(英尺)。
const unitScale = 0.3048			# convert meters to feet
const areaScale = 10.7639			# convert square meters to square feet
const acres = 43560 			# there are 43,560 square feet in an acre
添加报告
除了生成 3D 模型外,CityEngine 还可以在您的规则内运行和报告计算,以获得有价值的数据。这意味着您不仅可以可视化您的计划或开发,还可以生成数字报告 – 使CityEngine成为地理设计领域的强大工具。例如,它可以包括数字,例如总建筑面积 (GFA)、单元数或土地利用组合。此外,更改计划(包括模型和形状)时,报告会自动更新。
基于您的规则,您将报告一些数据。您一开始很简单,只报告占地面积。首先修改楼层规则,将其继续为名为“板块”的规则。在“板块”规则中,将几何图形分解为组件面 (comp(f)),然后将形状底部传递给“报告”规则以计算几何图形的面积。请注意,您需要首先拆分出底部形状,否则您的计算包括每个形状的所有表面积。
Floor -->
	case split.index == 0:
		color(getColor(use_ground))
		Plate
	else:
		color(getColor(use_upper))
		Plate

Plate -->
	comp(f) { side : Wall | bottom : Reporting | top : Top }

Reporting -->
	report("FloorArea", geometry.area)
To see the results, save the rule file (Ctrl+S), select the all the shapes (Ctrl+A), and then click Generate Models ![]() (Ctrl+G).
(Ctrl+G).
Expand the Report section in the Inspector window:

This tells us there are 117 total floors, totaling 85,704.20 square meters. To convert the floor area to square feet, simply multiply the geometry.area by the areaScale constant.
Reporting -->
	report("FloorArea", geometry.area * areaScale)

Now if you wanted to find out area by land-uses, or some important and common urban planning information, like density, or floor area ratio, you can make some simple modifications to your rules, passing along land-use information as parameters. You can modify your code to pass the land-use (use_ground and use_upper) as landUse parameters to the Plate rule, which in turn, passes it along to the Reporting rule:
Floor -->
	case split.index == 0:
		color(getColor(use_ground))
		Plate (use_ground)
	else:
		color(getColor(use_upper))
		Plate (use_upper)

Plate(landUse) -->
	comp(f) { side : Wall | bottom : Reporting(landUse) | top : Top }

Reporting(landUse) -->
	report("FloorArea." + landUse, geometry.area * areaScale)

为了计算容积率(FAR),您需要报告或计算地块的土地面积。若要获取此计算,请将报表操作作为@StartRule添加到“足迹”规则中。
@StartRule
Footprint -->
	report("LotArea", geometry.area * areaScale)
	extrude(building_height)
	#color(1,1,0)
	Mass

添加仪表板
仪表板是扩展 CityEngine 报告的好方法。使用仪表板,您可以获取规则中报告的任何值,根据需要应用其他计算,并使用条形图和图表显示信息。
首先单击主菜单中的窗口>仪表板。
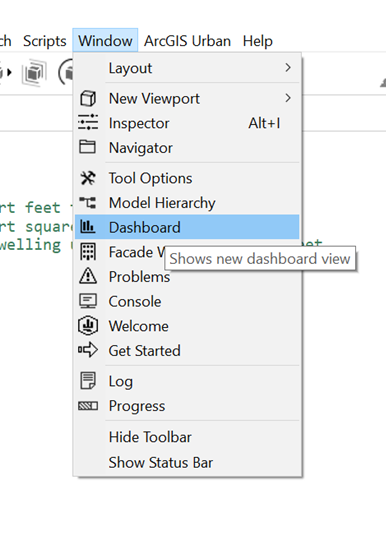
默认情况下,这将在“检查器”窗口中打开“仪表板”选项卡。
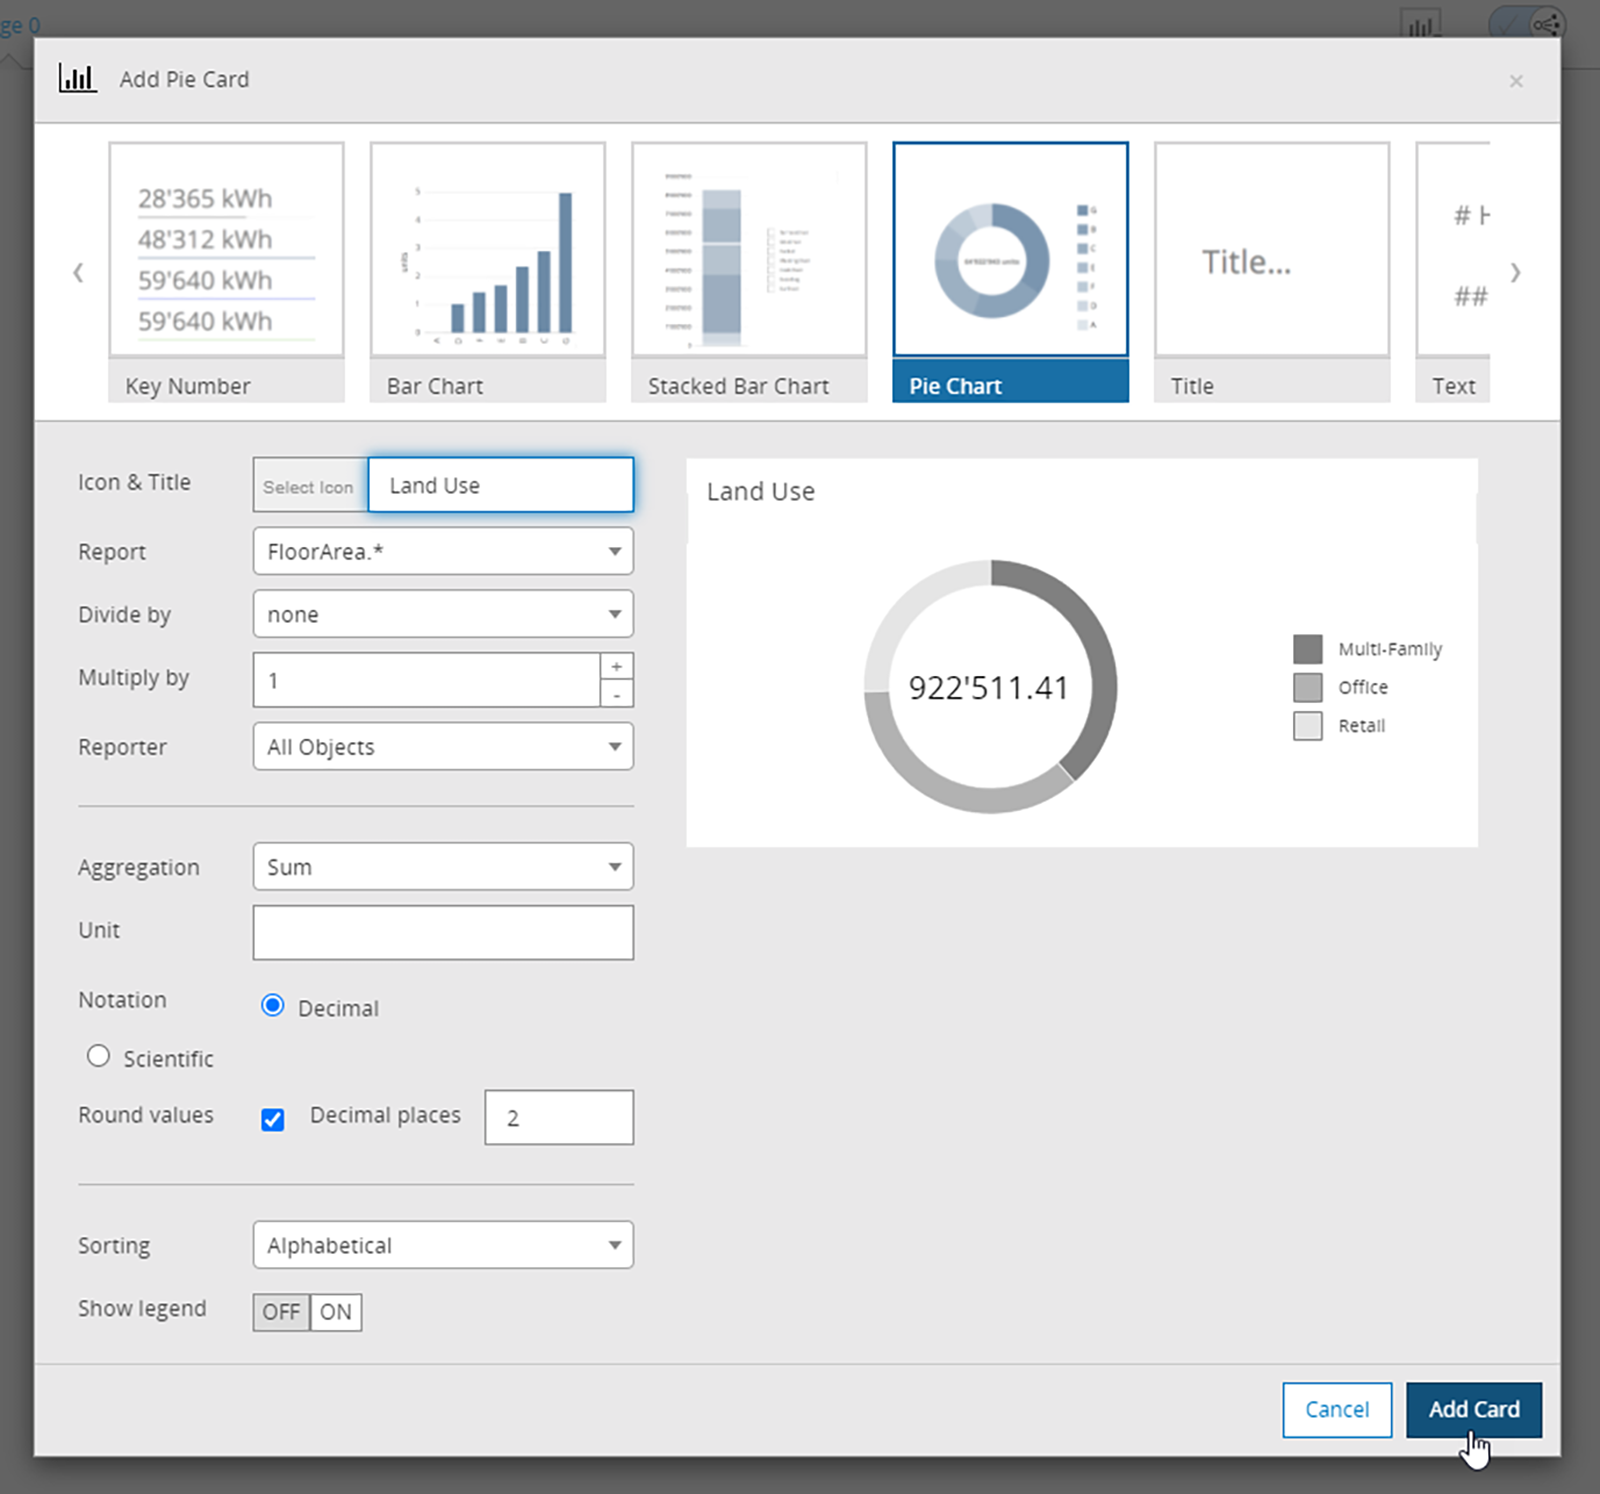
单击添加图表按钮以打开一个窗口。选择饼图,将土地利用添加到标题框,然后在报告下拉菜单中选择楼层面积。最后,单击添加卡片并放置在仪表板窗口画布中以添加卡片:
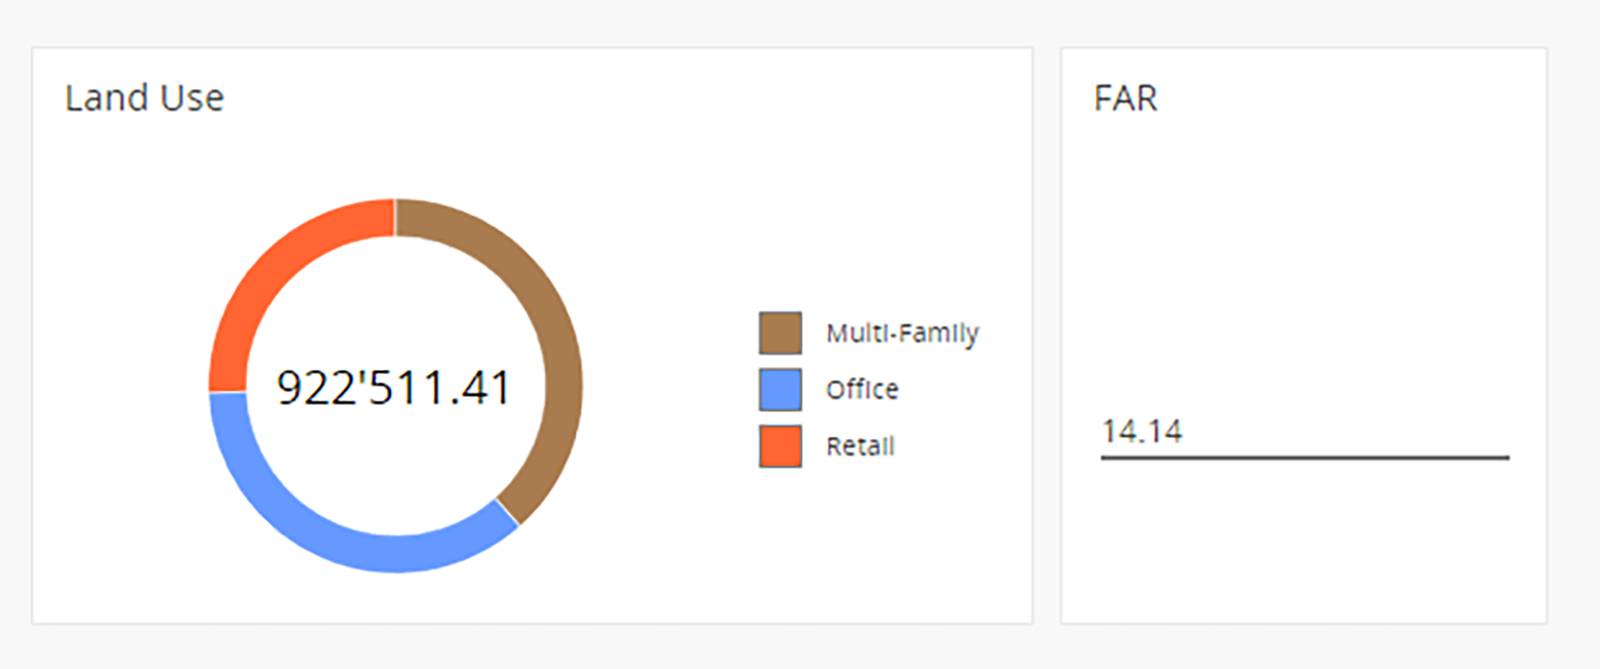
添加另一张卡。这次选择“密钥编号”。将标题命名为 FAR 并选择“楼层面积”*作为报告,然后按 LotArea 除以。单击添加卡片并将其添加到画布:
最后一步,您可以向图表添加颜色以匹配屏幕上建筑物的颜色。为此,您需要向报告规则添加第二行。这将调用土地利用的 get 颜色函数,并将其添加为图表的属性。
Reporting(landUse) -->
	report("FloorArea." + landUse, geometry.area * areaScale)
	report("FloorArea." + landUse + "#color", getColor(landUse))
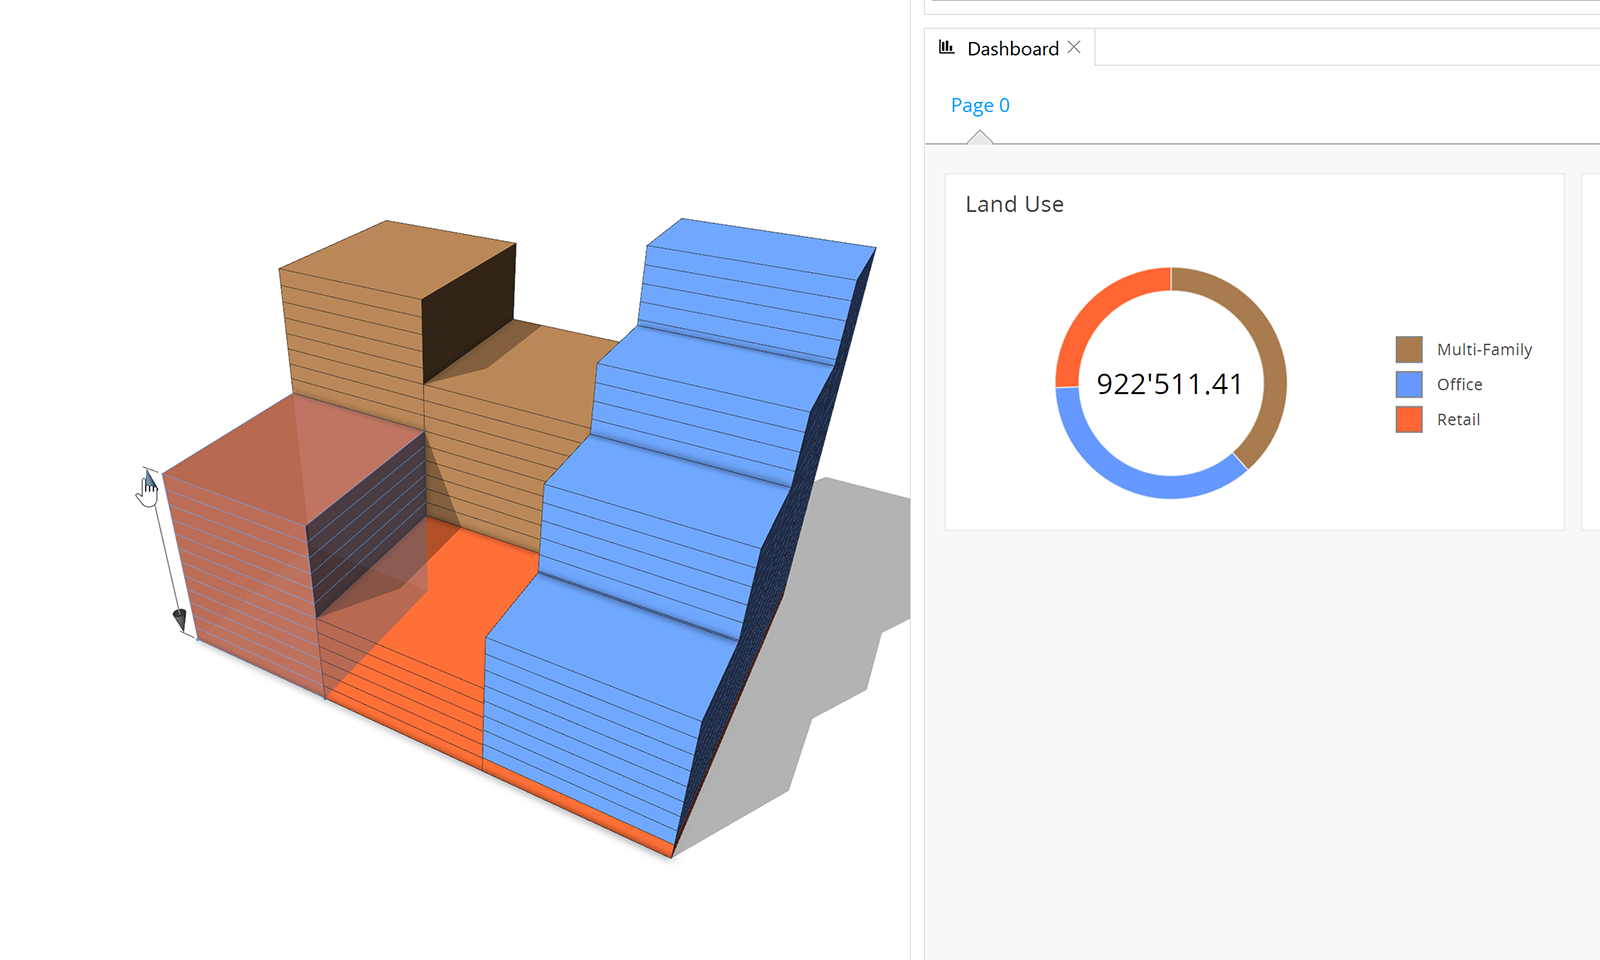
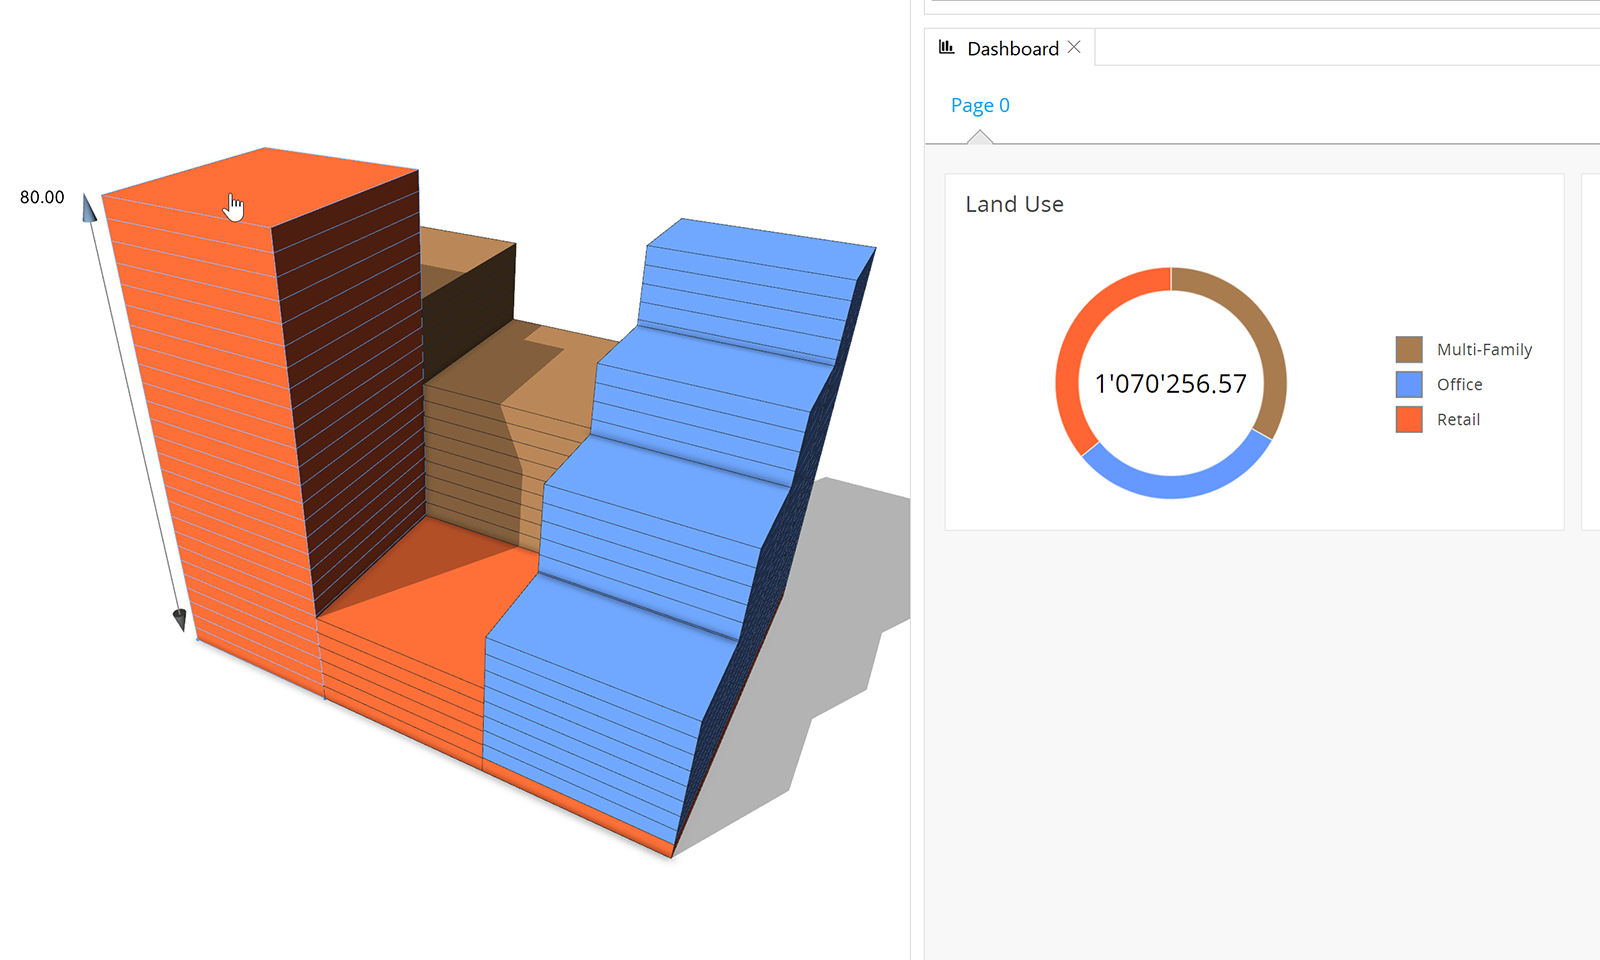
要查看使用 CityEngine 作为设计工具时仪表盘的强大功能,请选择建筑物并使用控点更改建筑物的高度。
仪表板实时更新,帮助城市规划师或设计师制定计划以满足当地要求或设计目标。
要继续学习 CityEngine,请参阅完整的 CityEngine 教程目录。


